REFLEKTOR.1 user manual
Light plot drafting in your browser: draw the rig, focus the beams, patch the fixtures and print a clean vector plot on A4 or A3.
Getting started
REFLEKTOR.1 runs in your web browser and needs no installation. It also works offline: open index.html from the app folder, or the published website.
The first time you open it, the Example Theatre loads so you can look around straight away. Press New for an empty stage. Your work is saved in the browser as you go. Use Save to keep a file of it.
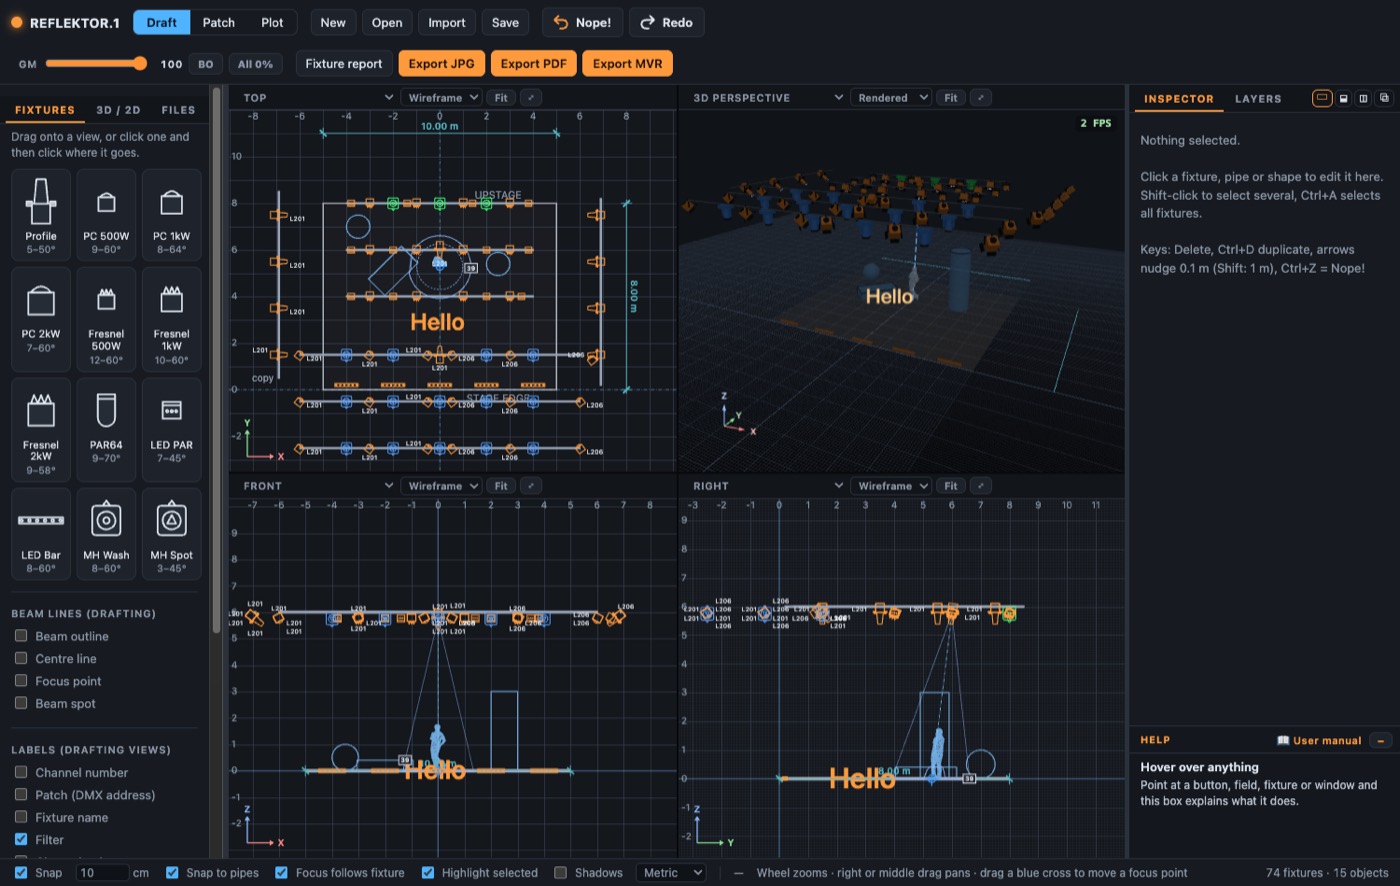
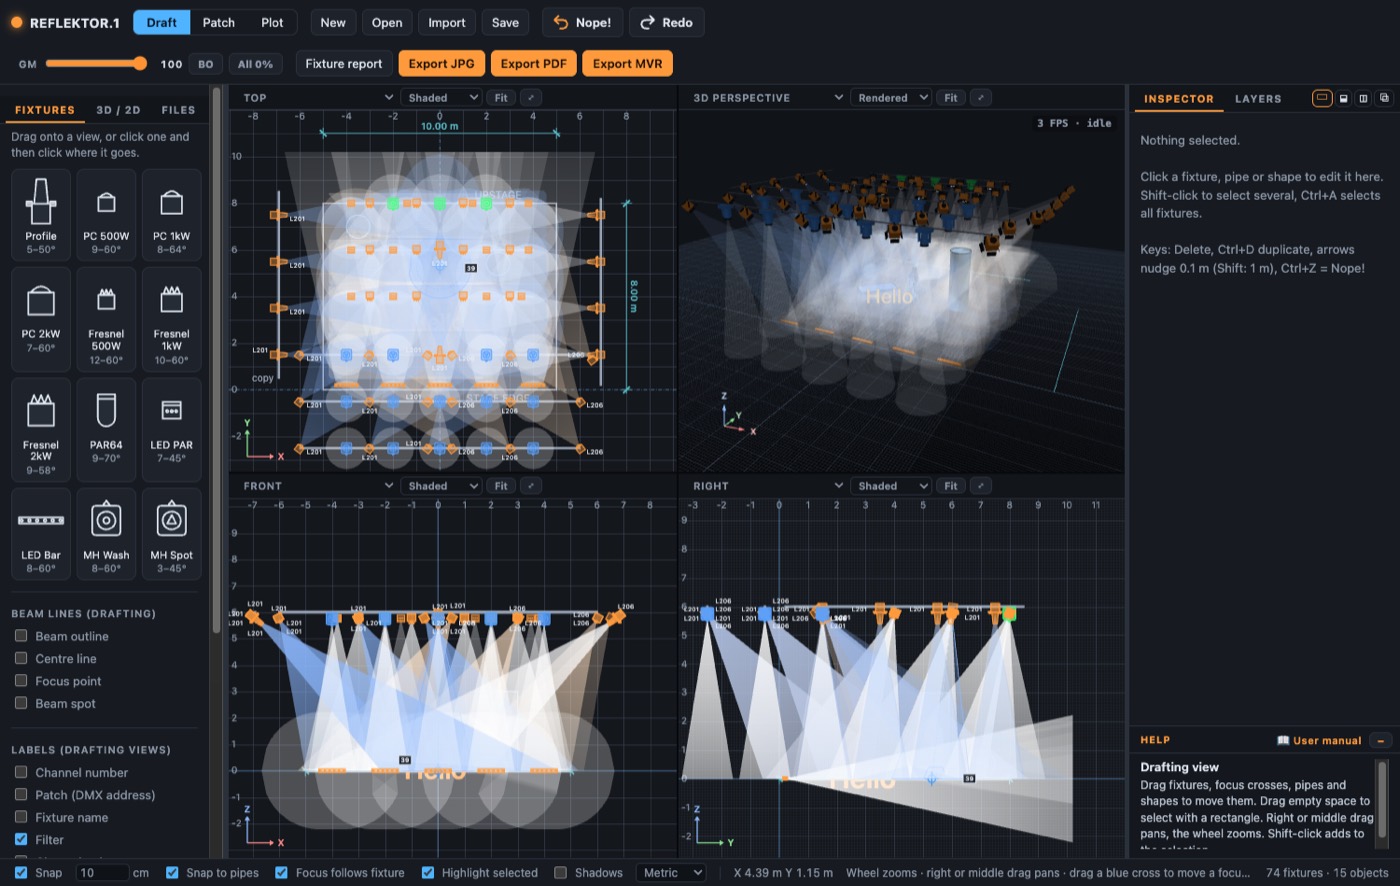
The screen
| Area | What it is for |
|---|---|
| Top bar | Draft, Patch and Plot modes; New, Open, Import, Save; Nope! (undo) and Redo; the grand master GM, BO (blackout) and All 0%; Fixture report and the exports. |
| Left panel | The libraries: Fixtures, 3D / 2D (rigging, shapes and tools) and Files. Below them: the beam-line switches, labels, stage and focus plane settings. |
| Middle | Four view windows (Draft), the patch table (Patch) or the paper sheet (Plot). |
| Right | The Inspector (options for what is selected), Layers, and the Help box. |
| Bottom bar | Snap and snap step, Snap to pipes, Focus follows fixture, Highlight selected, Shadows, metric or imperial units, and the cursor position. |
Views
Draft mode shows four windows. Each can show any view: Top, Front, Back, Right, Left, Isometric or 3D perspective. Pick one in the drop-down at the top of a window; the view that was there swaps places with it.
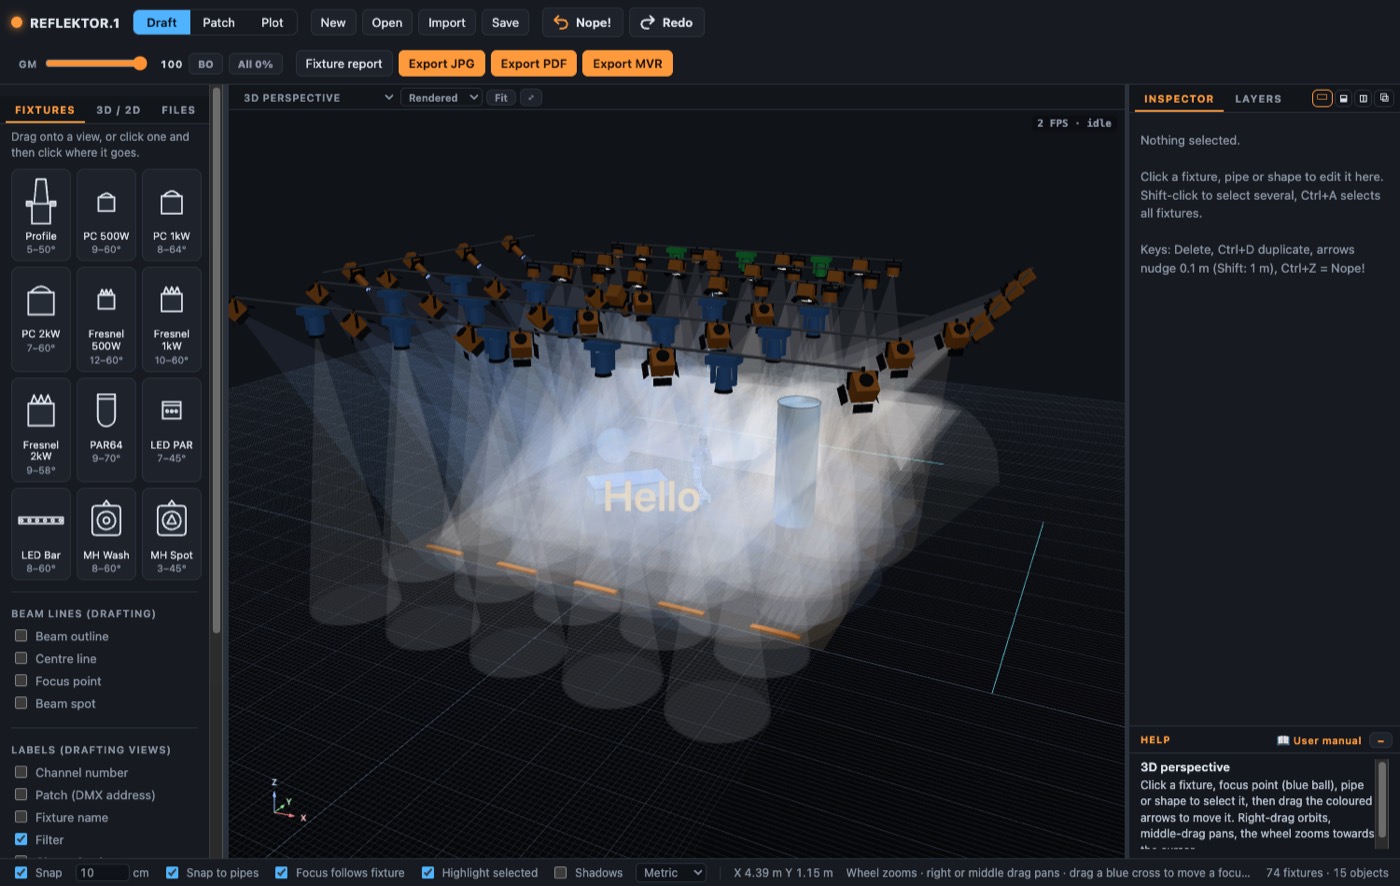
- Wireframe / Shaded / Rendered: the second drop-down sets how each window draws. Rendered shows the light falling on the stage and set; turn on Shadows at the bottom for cast shadows.
- Fit zooms to show everything (in 3D it resets the camera). ⤢ makes the window fill the drafting area; click it again for four windows.
- Drag the dividers between the windows to resize them.
- Zoom with the mouse wheel, pan with the right or middle button. In 3D the right button orbits and the middle button pans.
- The fine grid follows the snap step: set 25 cm and the grid shows 25 cm squares.
Placing fixtures
The Fixtures tab holds Profile, PC (500 W, 1 kW, 2 kW), Fresnel (500 W, 1 kW, 2 kW), PAR64, LED PAR, LED Bar, MH Wash and MH Spot. Drag one onto any view, or click it and then click where it goes. Esc cancels.
- Dropped near a pipe or truss, a fixture hangs under it and moves with it. On a truss it goes on the front tube; you can change that in the Inspector.
- New fixtures point straight down, with the dimmer at 0.
- Moving heads never rotate their base, only the head and yoke. Their beam starts at the head.
- The LED Bar has six lenses spread along its whole length (a little in from each end), and each throws a round beam. All six share the fixture's beam angle and dimmer; the light leaves from all along the bar, and their spots are drawn as one outline. In the side views the bar shows end-on, with two short lines where the light leaves.
Pipes and trusses
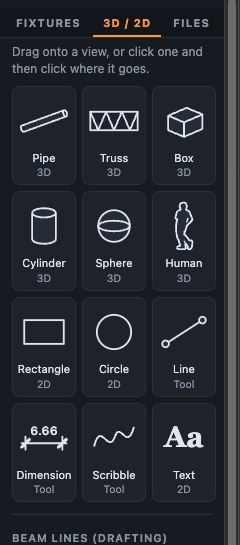
In the 3D / 2D tab, Pipe and Truss are your rigging. Fixtures hung on them follow when you move, turn or resize them. To take a fixture off its pipe, use Take off in the Inspector.
Shapes and drawing tools
- Box, Cylinder, Sphere are set pieces. They block light: beams that hit them stop there, and the spot wraps over them.
- Human: a 1.75 m figure for scale (its height is editable).
- Rectangle, Circle: flat shapes on the floor.
- Line and Dimension: press where it starts and drag to where it ends. Hover a line to see its end handles, then drag an end to change it. Dimension lines show their length with architectural tick marks.
- Scribble: draw freehand. Text: click to place, then type it in the Inspector.
The Inspector
Click anything to edit it in the Inspector. Shift-click adds to the selection. Dragging to the right selects what is completely inside the rectangle; dragging to the left selects anything it touches. With several fixtures selected, shared values are shown and "mixed" marks values that differ. Typing a value sets it for all of them.
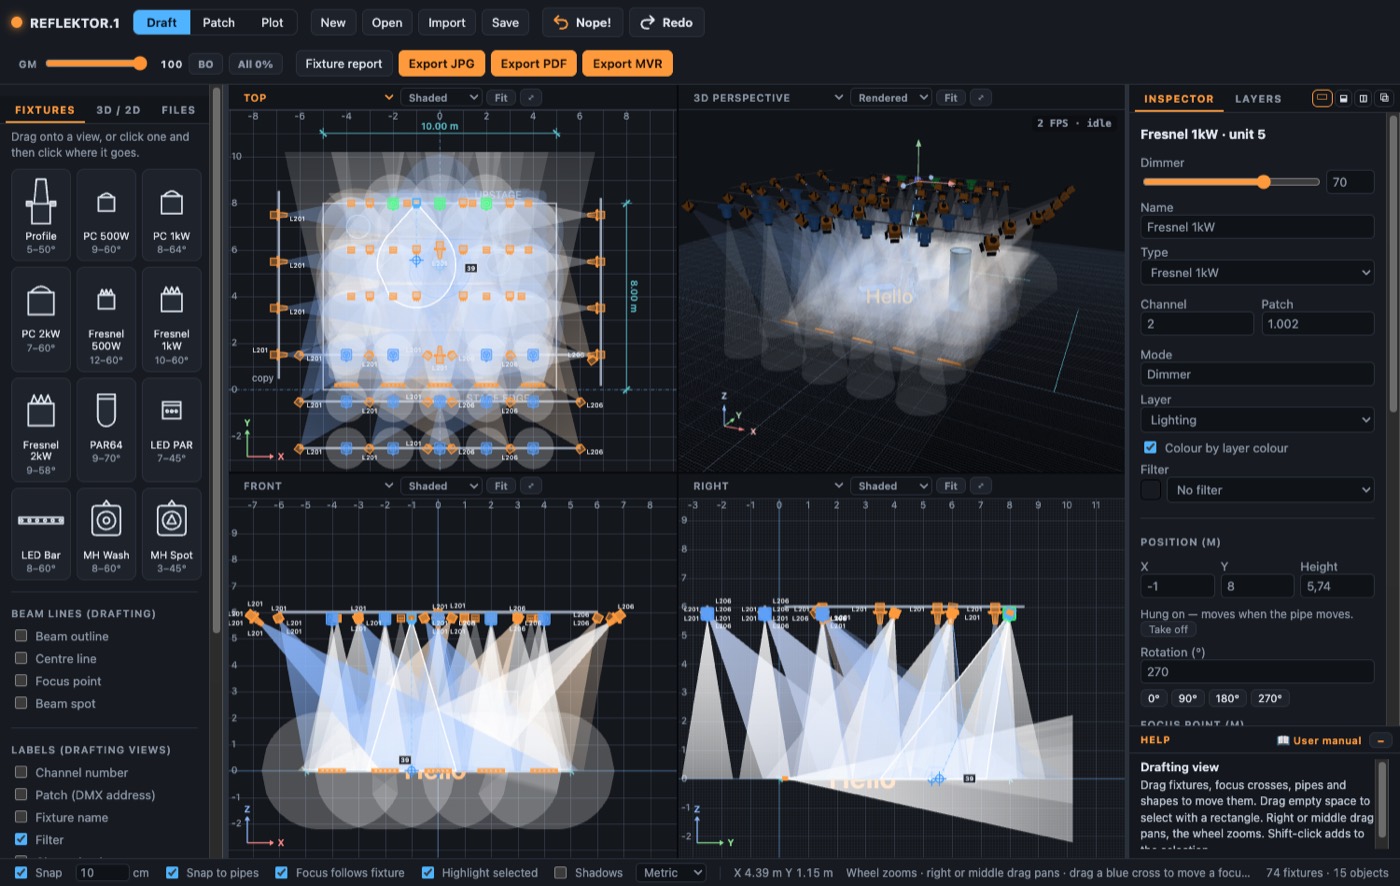
| Field | What it does |
|---|---|
| Dimmer | The fixture's light level (0–100). It keeps the level you set until you lower it or press All 0%. |
| Name, Type, Mode | Your name for it, the fixture type and its DMX mode. The channel count in the mode (e.g. "16ch") sets how many addresses it takes. |
| Channel, Patch | Control channel and DMX address as universe.address, e.g. 1.001 or 2.101. Each universe has addresses 1 to 512. |
| Layer, Colour by layer colour | Which layer it is on, and whether to show it in that layer's colour. |
| Filter | A Lee or Rosco gel; the beam takes its colour in the drafting views. |
| Position, Rotation | Where it hangs and which way it faces (0° stage right, 90° upstage, 270° the audience). |
| Focus point | Where it is aimed. You can also drag the blue cross in any view, or the blue ball in 3D. |
| Optics | Beam angle, with presets for the fixture type. |
| Knives | Profiles only: how far each shutter cuts in, and at what angle. |
| Beam lines | Tick boxes that override the general switches for this fixture. "Follow general switches" resets them. |
Beams, focus and optics
- Drag a fixture's blue focus cross to aim it. With Focus follows fixture on, moving a fixture moves its focus point with it.
- The focus plane (left panel, Stage) is the height focus points sit at. Turning Show focus plane on puts every focus point on the plane; turning it off puts them back on the floor.
- The solid ring is the full beam; the dashed ring is the inner spot (⅔ of the radius + 10 %).
- A beam aimed down lands on the stage (at the focus plane height). A beam that doesn't come down onto it, such as a floor-standing fixture aimed up, reaches 10 m into open space and ends there, unless it hits a set piece first.
- Hold Space and drag to turn the selection in 15° steps (works in the top view).
Light: dimmers, GM and BO
A fixture shows light once its dimmer is above 0, in every view, whatever the beam-line switches say. Brightness follows the level: at 100 it is brightest, lower levels are dimmer. In the 3D perspective the beams are kept softer, so overlapping beams show as layers.
- GM (grand master) scales every fixture. BO is blackout: all light off at once, levels kept. All 0% sets every dimmer to 0 (Nope! brings the levels back).
- With Highlight selected on, a selected fixture at 0 lights up so you can see it, along with its outline, centre line and focus point.
Beam lines and labels
The left panel has general switches for Beam outline, Centre line, Focus point and Beam spot, and Labels for channel, patch, name and filter. Drafting and the paper plot each have their own set, so a plot can show less than your working views. Each fixture can override the beam lines in the Inspector. Click a channel number in any view to select its fixture.
Layers, groups and backgrounds
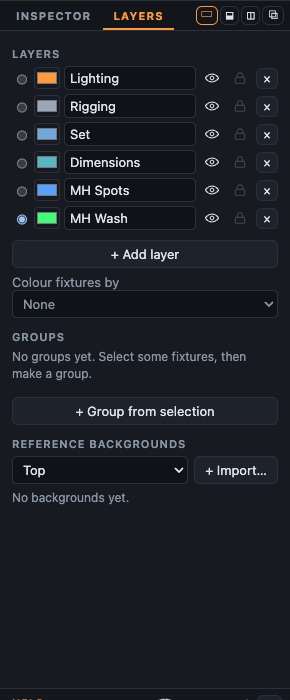
- Layers: the dot is the active layer, where new things go. Change a layer's colour or name; the eye shows or hides it, and the lock stops anything on it from being moved (it can still be selected and edited).
- Colour fixtures by: None, or Layer colour.
- Groups: select fixtures and make a group; its Select button picks them all again.
- Reference backgrounds: import a plan or elevation (PNG, JPG, PDF, SVG or DXF; save DWG files as DXF first) under any view. Drag it into place, drag its blue corners to scale it (it snaps), then lock it.
Moving the panels
The Inspector and Layers can sit as tabs, one under the other, or side by side (use the small buttons in their title bars). Drag a title bar or tab out to float a panel; floating panels snap to the window edges and to each other. Drop one back on the right-hand column to dock it: at the top or bottom edge, at a side, or in the middle as a tab.
Patch
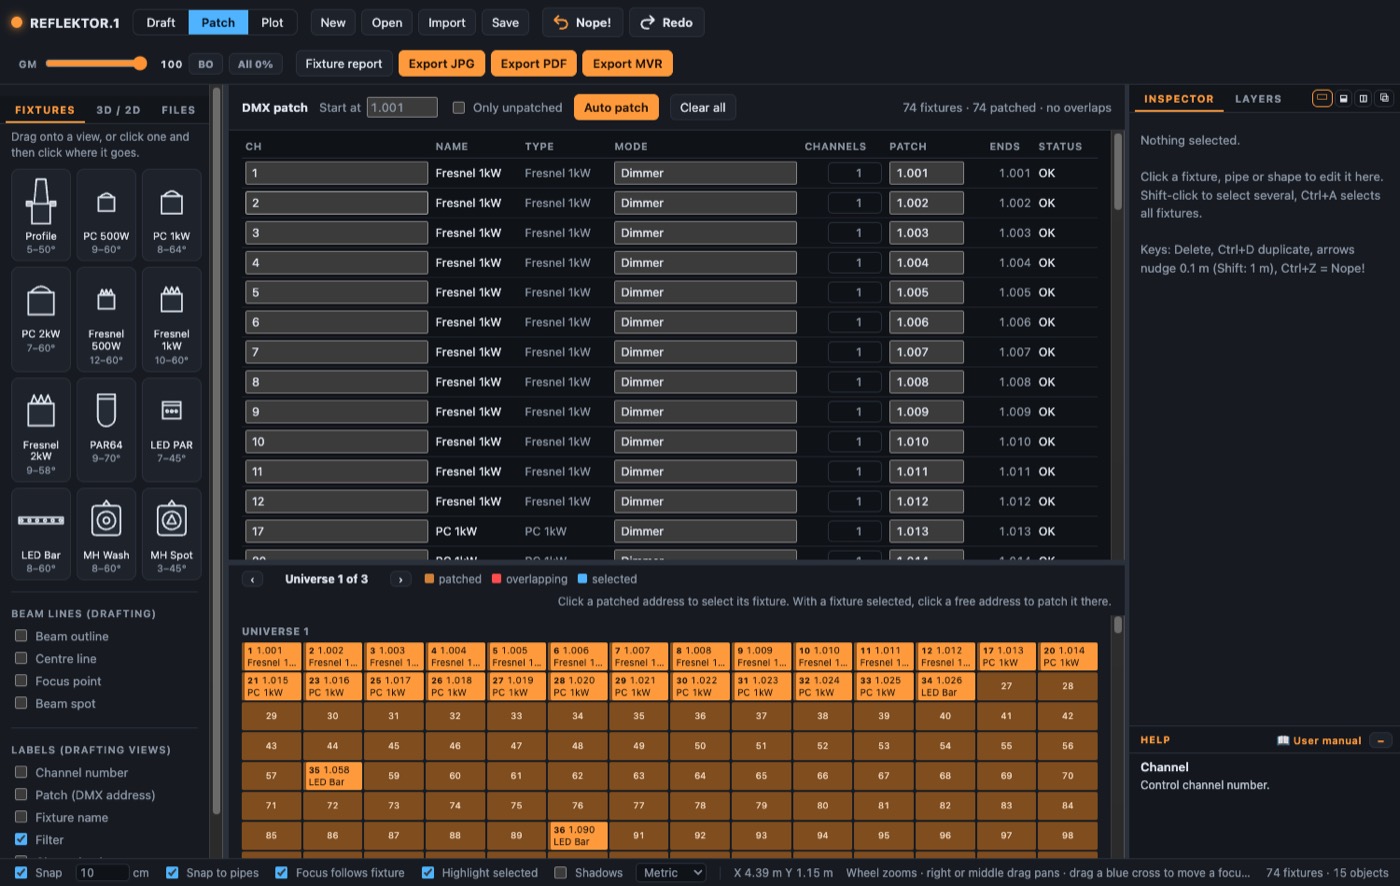
The Patch mode lists every fixture with its channel, mode, channel count and patch. Type a patch as universe.address, e.g. 1.101 or 2.001. Every universe has 512 addresses (1–512); a fixture can't be split over two universes. If a patch, mode or channel count would make a fixture run past address 512, the whole fixture moves to address 1 of the next universe and a message tells you (Auto patch does the same). A plain number counts on through the universes: 101 is 1.101, 513 is 2.001. The channel count is editable too.
- Auto patch gives fixtures addresses in channel order from the start address, never splitting a fixture across universes. Only unpatched keeps the addresses already set.
- The grid at the bottom shows every universe, address by address. Each fixture starts with a bright amber cell, and its other channels are darker. Overlaps are red.
- Click a cell to select its fixture, and drag a fixture to move it to another address. With a fixture selected, click a free cell to patch it there.
Plot (the paper)
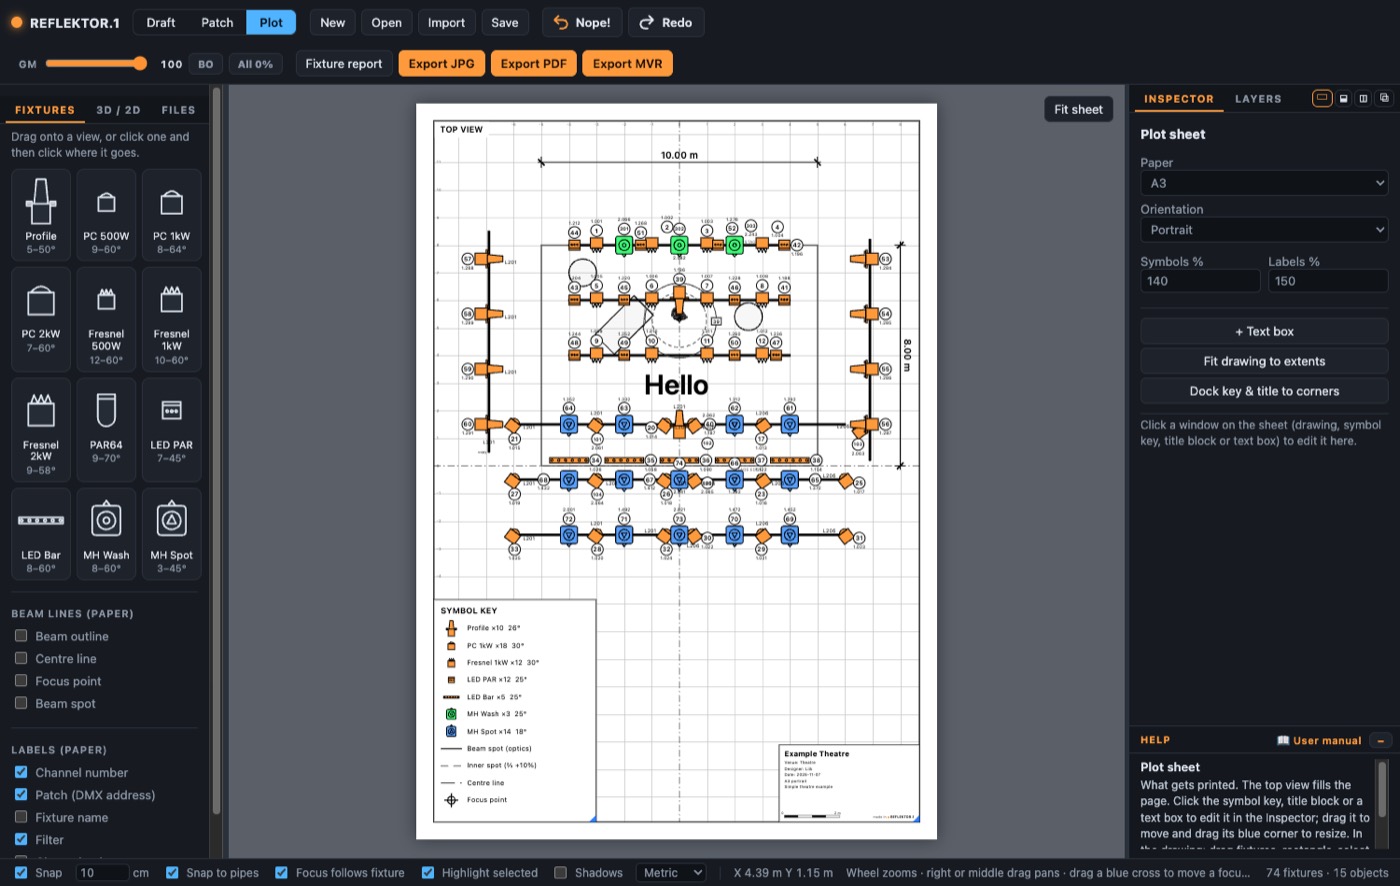
Plot mode shows the white sheet that gets printed. It has the drawing window (the top view), the symbol key, the title block and any text boxes. Click a window to edit it in the Inspector, drag it to move, and drag its blue corner to resize. Click empty paper or the grey area for the sheet options.
- Sheet: A4 or A3, portrait or landscape, symbol and label size, + Text box, Fit drawing to extents, Dock key & title to corners.
- Drawing: Fit to extents fits everything with a margin, clear of the key and title block. No scale is printed then. Pick a scale (e.g. 1:50) to print it in the view name and title block, with a scale ruler.
- Symbol key: heading, text size, which rows show and your own wording or extra rows. It explains the beam lines as soon as any fixture shows them.
- Title block: title, venue, designer, drafter, phone, email, date, notes and text size. It ends with "made in ● REFLEKTOR.1".
Export
| Button | What you get |
|---|---|
| Export PDF | The plot sheet as a sharp vector PDF on A4 or A3. |
| Export JPG | The plot sheet as a picture. |
| Export MVR | The rig for visualisers and consoles that read MVR, with 3D models. Moving heads export hanging straight. |
| Export MagicQ | A head list for ChamSys MagicQ. In MagicQ go to Patch → View Chans → IMPORT HEADS and choose the .csv file. Every fixture comes in with its head number (channel), name, universe and address, gel and position. Conventional lights come in as dimmer channels; for LED and moving lights pick the exact head type in MagicQ afterwards (morph). Import in REFLEKTOR.1 also reads a head list exported from MagicQ. |
| Fixture report | A table of every fixture (channel, name, type, mode, patch, filter, layer, note), editable in place, with CSV, patch CSV and PDF downloads. |
Saving and files
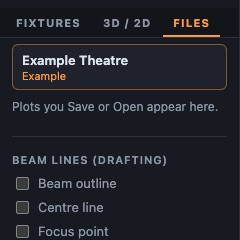
- Save downloads your plot as a REFLEKTOR.1 file with the extension .rflktr.
- Open opens a .rflktr file (older .ref and .json files open too).
- The Files tab keeps every plot you Save or Open in this browser, plus the Example Theatre. Click one to open it; × takes it off the list.
- Your current plot is also saved in the browser automatically. Opening a plot replaces what is on screen, and Nope! brings it back.
Keys and mouse
| Keys | Action |
|---|---|
| Ctrl/⌘ + Z | Nope! (undo) |
| Ctrl/⌘ + Y or Shift+Ctrl+Z | Redo |
| Ctrl/⌘ + C / V | Copy / paste the selection |
| Ctrl/⌘ + D | Duplicate (copies of numbered names get the next number) |
| Ctrl/⌘ + drag | Drag a copy, leaving the original in place |
| Ctrl/⌘ + A | Select all fixtures |
| Delete | Delete the selection |
| Arrow keys | Nudge 10 cm (with Shift: 1 m) |
| Space + drag | Turn the selection in 15° steps |
| Alt while dragging | Move freely, without snapping |
| F | Fit all views |
| Esc | Cancel placing, clear the selection |
| Mouse wheel / right or middle drag | Zoom / pan (3D: right drag orbits) |
Tips and questions
I can't see any light.
New fixtures start at 0. Raise the Dimmer in the Inspector, and check that GM is up and BO is off.
Something won't move.
Its layer may be locked (the lock icon in Layers), or it may be a locked reference background.
The plot prints no scale.
Fit to extents uses an exact fit, so no scale is printed. Choose a scale in the drawing window's Inspector to print it.
Where is my work?
It is saved in this browser automatically, and in the Files tab after you Save. For safety, keep a .rflktr file with Save.
A little secret
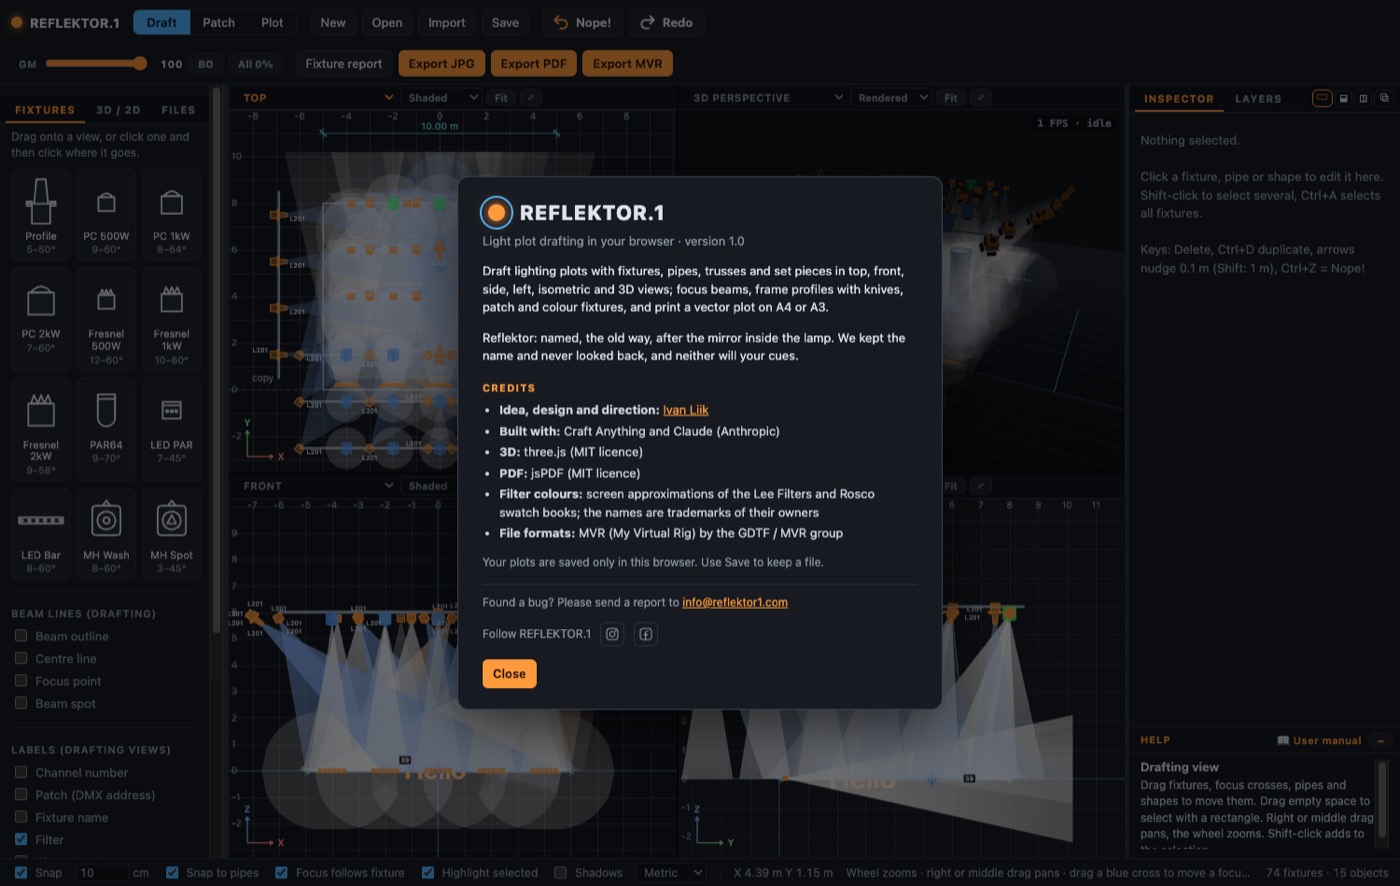
Click the glowing amber dot in the About window (click REFLEKTOR.1 at the top left) for a short break.
Bug reports
Found a bug or have an idea? Send it to [email protected]. Please say what you did, what you expected and what happened instead; a screenshot or your .rflktr file helps a lot.
News and examples: follow REFLEKTOR.1 on Instagram and Facebook (links also in the About window).